painting over old exterior paint

Painting Over Old Exterior Paint: Is it Advisable?

Contact Tucson’s top-rated painting contractors today at 520-327-3200.

Painting your property’s exterior is one of the best ways to increase curb appeal. However, you must decide what to do with the existing paintwork.

Is painting over old exterior paint advisable? It depends.

Painting Over Old Exterior Paint: How to Decide

You should only paint over old exterior paint if it’s not loose and flaking. Otherwise, you’ll end up with a shoddy paint job since the new  paint won’t stick to the surface.

Use the paint adhesion test if you’re unsure about the state of the paint on your exterior wall.

Here’s how to carry out the test:

  1. Cut a small X into the surface with a sharp blade
  2. Cut out some sticky tape
  3. Press it firmly across the marked surface
  4. Rip off the tape
  5. Check the results

Painting over old exterior paint is not a good idea if the old paint comes off with the sticky tape. Be sure to test different parts of the wall for best results.

Old and flaking paint shouldn’t stop you from giving your property a new look. You can still complete the painting, but it requires  an extra step.

How to Paint Over Exterior Wall with Old and Flaking Paint

Prepare the Work Area

The first step to painting is to clear the area. Remove any furniture or exterior fixtures to avoid getting paint stains on them. Protect the floor around the area with canvas sheets and tape over any sockets, handles, etc.

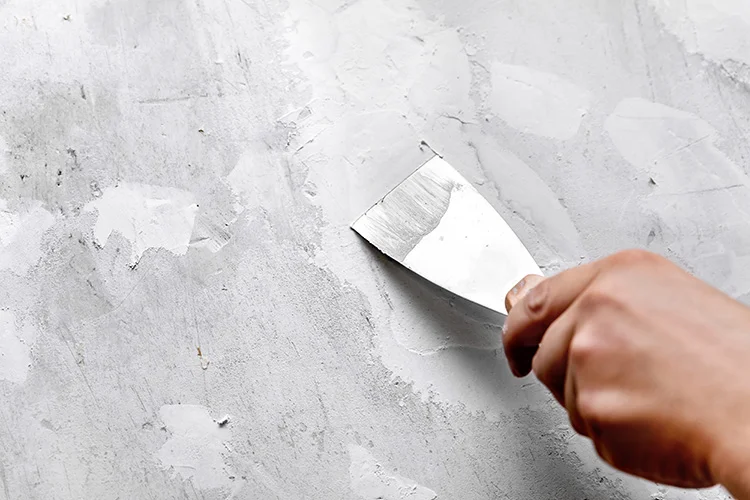
Scrape Off the Flaking Paint

If you’re in any doubts about the durability of your old exterior paint, get a scraper and get to work. It’s better to scrape off old paint unnecessarily than to make the mistake of painting over peeling paint.

This extra step will increase your project timeline by a few hours, but it will also save you many hours in repeat work!

Fill Out Holes and Cracks

Filling any cracks on the surface will give a smooth look after the project. Use some putty and a filling knife to cover up all holes. Areas with deeper holes may require multiple applications.

Sand down the filled areas to get a flat surface.

Clean the Surface

Vacuum up any debris and wipe down the surface with a cloth and some detergent to remove dirt and grease. Complete the cleaning process by wiping with clean water.

Use a Primer

A primer will increase the paint retaining capacity of your surface. It’s even more important if there’s no flaking and you intend to paint over old paint.

Old dark colors on previously painted surfaces may ruin the appearance of lighter colors, forcing you to apply multiple coats of the new color. A primer prevents this problem by covering up the old color.

Apply Your New Paint

Apply two coats of the new paint. Wait for a layer to dry thoroughly before applying another.

Get Professional Help with Exterior Painting

Painting over old exterior paint is a time-consuming home improvement project—especially if you need to remove flaking paint first. You also need to learn about the best time to paint a house exterior for the perfect results.

Call Wiese Painting Contractors Inc. at 520-327-3200 for all your exterior painting projects in Tucson, AZ.

common painting mistakes

Four Common Painting Mistakes and How to Avoid Them

Call your local Tucson painting pros at (520) 327-3200 today!

A new paint job can boost the aesthetic of your home and create a fresh new look. Unfortunately, most people make one or two mistakes when painting their homes or businesses.

Wiese Painting Contractors, Inc., knows how frustrating a less-than-perfect paint job can be. Below are the most common painting mistakes that people make when trying to create a new interior or exterior look.

The best way to avoid these common painting mistakes and ensure high-end results is by contacting your local painting experts in Tucson, AZ. Wiese Painting Contractors, Inc., uses the best painting tools and a keen eye for detail to provide exceptional results for every Tucson home or business.

1. Over-Brushing

Using the right amount of brushwork is essential for a smooth finish, especially when painting cabinets, doors, or other woodwork. Brushing too often can create lines and ridges, making it look sloppy.

For best results, dip the paint brush and quickly add a layer of paint to the area. Next, use only a stroke or two to level the surface and create a smooth finish.

2. Getting a Single Estimate

If you hire a professional to paint for you, it is crucial to get more than one estimate. Exploring different companies and their prices will give you a better idea of which contractors will help you achieve your painting objectives without going over budget.

Look for the services a company offers, reviews, and prices. Considering at least a couple of companies will help you find the best painting contractor for the job.

3. Putting the Paint Roller on the Floor

Although it can be tempting to put your paint-covered roller on the floor when taking a break, it could lead to less than perfect results. Putting your roller on the floor allows it to pick up dirt, hair, and other debris that can then spread onto your walls.

To keep your freshly-painted walls clean and smooth, avoid putting the roller directly on the floor or near any dirty areas.

4. Not Rolling in Multiple Directions

One of the most common painting mistakes people make is rolling paint in only one direction. Doing so can create unsightly marks and a sloppy finish.

To ensure a smooth and even finish, paint in sections of five or six square feet. After painting one section, quickly move to the next one to prevent paint edges from drying.

Call Your Local Paint Pros

Wiese Painting Contractors, Inc., believes that a paint project requires more than high-quality paint and primer. Our experts are meticulous with their work to ensure that you can avoid uneven results and peeling paint.

Hiring an experienced professional is the best way to avoid common painting mistakes and save money. Whether you need residential or commercial repainting, Wiese Painting Contractors, Inc., has the tools and skills required for high-end results.

Avoid common painting mistakes and call the experts at Wiese Painting Contractors, Inc., in Tucson, AZ. Call now at (520) 327-3200 to get an estimate!

commercial repaints

Top 7 Reasons for Commercial Repaint Projects in Your Business

A fresh paint job on the exterior of your building can brighten up the look and feel of the entire property. If you’re a business owner, you need occasional commercial repaints from a qualified painting company to keep your business premises looking professional and fresh.

As Tucson’s reliable painters, we know all the benefits of regular paint jobs and the results our clients enjoy after such projects. Here are seven reasons for commercial repaints that we’ve found over the years.

Improved Foot Traffic

Most people are attracted to well-kept buildings and will avoid any that looks decrepit. If you want more customers coming through your business, you need to create the best first impression by repainting your worn building.

Painting the exterior alone isn’t enough because a drab-looking interior with many marks on the wall will discourage repeat business. In businesses where an increased length of stay equates to more spending, you need all the help you can get to keep customers comfortable, and a paint job is an excellent solution.

Uphold Business Reputation

Even with businesses outside retail, hospitality, or others where you don’t need foot traffic to generate money, you have to encourage a healthy perception for your business because your reputation is still at stake. A new paint job will make the building more attractive to passersby. Your building should add to the aesthetic appeal of your surrounding neighborhood.

Improved Employee Productivity and Morale

A building with dirty walls, peeling paint, and a generally drab appearance indirectly communicates instability to your employees. They are likely to link the dirty walls to a weak bottom line. A new paint job from qualified commercial painting contractors can instantly energize the workplace for existing employees and give new ones a good first impression of your brand.

Communicate a Rebrand or Change of Ownership

If your business has recently rebranded, changed ownership, or pivoted, the brand colors may have changed as well. Repainting your building is a great way to communicate those changes. 

Protection Against Future Damage

Regular commercial repaints of your business premises is good preventative maintenance. Your building’s exterior is constantly exposed to weather elements. When done right, painting your building can maintain a barrier against moisture and prevent mold or mildew from taking root inside and causing costly damage.

Stay Updated With Building Code Requirements

If your property is more than 40 years old, it may still have some lead in the paint, which may be against the law in some places. You need to secure the services of a qualified painting company to remove the lead paint first before repainting the structure with your preferred color.

Improved Indoor Air Quality

Flaky paint can add pollutants and allergens to the environment. A fresh coat of paint will improve the indoor air quality and reduce the load on your indoor air filters.

Choose the Right Commercial Painting Company

Overall, commercial repaints can increase profit and enhance your brand’s reputation. However, you need to choose the right painting company to enjoy these benefits. At Wiese Painting Contractors Inc., we have more than six decades of experience helping businesses like yours transform their property.

Call us at 520-327-3200 to discuss your painting needs or continue exploring the site to learn about our commercial painting services.

how to pick paint colors

How to Pick Paint Colors for Your Home: 7 Tips and Tricks

Experience first-class painting services in Tucson from Wiese Painting.

Picking the right paint color for your home can be a daunting task. Choosing the perfect color can help accentuate the beauty of your home. Alternatively, an unappealing color can ruin it.

Wiese Painting Contractors Inc. has over six decades of painting experience. We help our customers choose the best hues for their interior walls and help bring out the beauty of their homes. Our painting experts will help rejuvenate your home, making it feel fresh and modern.

Let us share our guide on how to pick paint colors for your home.

Tip 1: Decide on Decor First

To pick paint colors suitable for your home, first, consider the colors of your interior decor. Your paint color must complement the color of your furniture, art pieces, dining tables, and more.

Tip 2: Find a Piece That Inspires You

We recommend finding an interior design to model your home after. There are thousands of pictures you may use as a jumping-off point.

Tip 3: Choose Neutral Colors

We advise sticking with neutral tones for walls. There are many reasons to avoid vivid colors for interior walls. Neutral colors allow for more flexibility with your floor and decor.

Tip 4: Pay Attention to Undertones

Each color has an undertone that you may not recognize with the naked eye. These undertones can impact the appearance of your walls negatively.

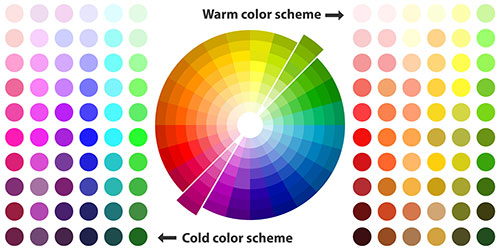
Red is an example of a warm color. Cool undertones can be blue, gray, or green. Consult with a paint expert to find the best undertone for your home.

Tip 5: Choose Paint Colors with Large Paint Swatches

You should always select the biggest paint swatches possible. Doing so will allow you to sample your paint colors in your home. Make sure you pay attention to the effect lighting plays on your paint.

Tip 6: Decide on Paint Type

There are a few different paint finishes you can use on your walls. Avoid gloss, as it is too bright for walls. We suggest a satin finish or eggshell paint type for living rooms. For bedrooms, opt for either flat or matte.

Tip 7: Create a Palette

Find a color flow in your home. While you do not have to use one color for your entire house, colors must complement each other. Resist painting each room a different color.

Call Us Today

Choosing the perfect paint color for your home is crucial. Our reliable painting contractors will ease your mind with our superb customer service.

Wiese Painting Contractors Inc. is happy to help you decide how to pick paint colors for your home. We have a massive collection of paint colors to choose from and can improve your home’s interior dramatically. Call our Tucson, AZ, office at (520) 327-3200 to speak with one of our contractors today! After you paint your home, learn how to avoid paint chips and how to clean painted walls.

cleaning painted walls

Cleaning Painted Walls: Best Methods

Contact our painting experts in Tucson by calling 520-327-3200.

Freshly painted walls can make the difference between a boring interior and exterior design and a stylish design that catches people’s eyes. 

Unfortunately, most people do not invest in cleaning painted walls. On average, you should clean your walls at least once a year. 

With over 65 years in Arizona, Wiese Painting Contractors Inc. has the experience to handle any painting job you put in front of us. We run a smooth operation that makes your home feel refreshed and stylish. Whether you own a commercial or residential property, our licensed and insured contractors are here for you. 

Here are some of the best methods for cleaning painted walls. 

Preparation 

Before you begin the cleaning process, you must rid your walls of dust or debris. You can dust the walls with a cloth, vacuum, or brush to prepare for cleaning. 

We recommend a foam craft brush for getting into corners and around edges. Also, make sure that you place a towel below the walls you plan to clean. Drips and spills are common when cleaning painted walls. 

Select a Cleaning Solution 

Next, you must select a cleaning solution to remove dirt from your walls. Your choice should center around what kind of paint you have on your walls. 

For matte, eggshell, or flat paint, you should use a mild cleaning solution. To create a mild wall cleaner, you can combine dye-free soap with dishwashing detergent. 

If you have a glossy paint finish, we recommend using a degreasing agent with your cleaner. These finishes are more durable than matte or eggshell coats, allowing you to use a stronger soap in your cleanser. 

If the paint job on your walls is oil-based, you may use an even stronger cleanser. A popular recipe for an oil-based cleaner is to mix a teaspoon of liquid dish soap with a tiny amount of ammonia. 

Washing 

When you wash your walls, you want to do it gently. If you are too abrasive, the paint will chip or peel off. Make sure you use the soft side of the scrub to rub the cleaning solution onto your walls. 

To achieve the best results, clean the wall in circular motions and work from the top down. Be careful to keep water away from electrical outlets to prevent dangerous sparks and electrical issues. 

If your regular cleaning solution did not do the trick, try spot-treating the walls using a mixture of baking soda and water. 

Drying 

If your sponge did not absorb all the water from your washing session, you should use a dry towel to mop up any extra liquid from your walls. Wait for your wall to dry before hanging pictures back up. 

Invest in Commercial and Residential Painting 

Having clean painted walls can enhance the aesthetic appeal of your home or business. Wiese Painting Contractors Inc. proudly serves the Tucson, AZ, community with top-notch paint cleaning services. Our skilled team can clean your painted walls quickly and efficiently with the highest quality equipment in the industry. 

If your home or business requires cleaning painted walls, you can call the Wiese Painting Contractors Inc. office in Tucson, AZ, at 520-327-3200. Read about our process to learn more interior painting preparations.

Chemical Resistant Floor Paint

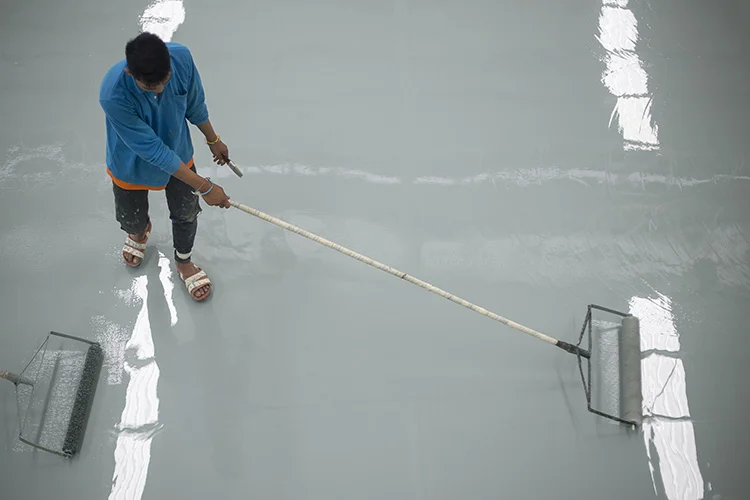
person applying chemical resistant floor paint

Almost all surfaces would be exposed to corrosives at some point in their lifetime. Most of these (like cleaning products) are pretty harmless, and your paint withstands without giving out. However, in an industrial environment, it is not so. They are exposed to chemicals, acids, alkalis, salts, and others that are harsh for most surfaces.

That is why you need to protect them with a coating that would resist the chemical without breaking. This type of paint would also resist any acid and alkali that is a part of the regular cleaning process and maintenance.

This article takes you through various chemical-resistant floor paint, maintenance, and more.

What is Chemical-Resistant Paint?

Chemical-resistant paint provides superior protection from harsh substances. It has been designed to shield the floor from chemicals. It is a type of alkyd paint that is thicker and harder when it dries. Moreover, it retains its good looks for a long time despite being in contact with corrosives.

You can apply it to any surface that needs protection from chemical spills. For example, floors, walls, doors/windows, utilities, ceilings, and more. Besides, it works on any substrate, including wood, metal, ceramic, concrete, and masonry

Chemical-resistant paint is available in various forms:

  • Epoxy
  • Polyurethane
  • Phenolic
  • Fluoropolymers such as Xylan and Teflon

Epoxy Coating/Sealer

Epoxy is a type of polyamide paint that provides an acid- and chemical-resistant coating for any surface when applied. An epoxy floor is available in two types: one-component, two-component, powder, and others.

One-component epoxy is used in new constructions as a base. The two-component epoxy goes over it, giving it color. It also protects against chemical substances.

Polyurethane

Polyurethane is a type of synthetic resin that can be applied as a paint or floor coating. It provides durability and chemical resistance, making it the best choice for various surfaces. In addition, polyurethane serves as an excellent medium for applying pigments, primers, and sealing materials. Sought for its colorful appearance, it is often used in homes and commercial spaces.

Phenolic Coating/Sealer

A phenolic coating is a type of two-component resin that is applied either air or flash-dry. It provides excellent chemical resistance to surfaces like wood, metal, plastic, and masonry.

Fluoropolymers (Xylan)

Xylan is a fluoropolymer with Teflon consisting of thermoplastic resins. When dried, it slips easily on surfaces. It also provides excellent adhesion along with chemical resistance floor paint.

Is Epoxy Floor Chemical Resistant?

professional cleaning epoxy floor

Epoxy coating provides superior chemical resistance against most corrosives. Industries often use it for painting concrete floors and walls. It is ideal for use in high-exposure areas. For example, secondary containment, trenches, pump pads, and solvent storage.

It is also ideal for applying on other surfaces such as metal and PVC. The advantage of using chemical-resistant epoxy is that it is cheaper than paint. This is because you would have to apply multiple layers in an industrial environment. Ensure that you read the application instructions. The application process varies depending on the product.

Is Silicone Caulk Chemical Resistant?

Yes, silicone caulk is chemical resistant. Industries use it for sealing pipes and fittings where chemicals are used at high concentrations. For example, laboratories, hospitals, wastewater treatment plants, and pharmaceutical companies. It works well with compounds such as hydrocarbons, oils, greases, organic solutions.

What is Acid-Resistant Paint?

Acid-resistant paints can prevent corrosion caused by acids, alkalis, salts, and bacteria. They are also water-resistant. These paints generally include polyurethanes, alkyd resins, epoxy resins, acrylic resins, and vinyl. They can withstand a wide variety of acids such as sulfuric acid, nitric acid, hydrochloric acid, phosphoric acid, and more.

Which Paint Coat Gives Extreme Chemical-Resistance?

According to experts, polyurethane is the most chemical-resistant floor paint available on the market. This is because they can resist acid, salt, mildew, fungi, bacteria, alkali, and other harmful chemicals. As a result, polyurethane paint is ideal for use in chemical facilities. For example, food processing areas, labs, hospitals, and pharmaceutical companies.

Chemical Resistant Epoxy Coating Vs. Paint

Epoxy paint and coating both resist corrosives to some extent. However, they are not the same and have some noticeable differences. Here are a few points you may have to consider if you choose it for your industry floor.

  • Epoxy coatings are thicker than epoxy paints.
  • Paints may not be as chemically resistant as an epoxy coating.
  • Epoxy coating is quite tricky to apply.
  • Coatings generally have a longer working life than paints.
  • Epoxy coating is more resistant to damage from abrasion or impact. However, if exposed to sunlight, it chalks and abrades faster.

How do You Protect Concrete Floors from Acid?

An epoxy coating protects concrete floors from acid and other corrosives. It is famous for its excellent chemical resistance. Not only does it offer protection against acids, but it also prevents damage caused by salt, alkalis, and other common corrosives.

Chemical Resistant Concrete Coating

Concrete coating is a protective layer applied to concrete surfaces. Generally, it is more resistant than paint. There are several types of coatings, including epoxy, polyurethane, and other hydrophobic solutions. While some are chemical resistant, others only resist water and some organic liquids.

Industries use a chemical-resistant concrete coating to protect surfaces from corrosive substances. They are a good solution for areas with high exposures to acids or alkalies.

Conclusion

There are many different types of paints and coatings available for industrial use. Some of them are more chemical resistant than others. If you want a chemical-resistant floor paint or coating, look for epoxy or concrete coatings.

professional chemical cleaning the floor

Epoxy paint protects against chemicals, fuels, oils, solvents, water, and alkalis. It also provides longer service life than other types of paints. Epoxy paints are available in many colors, so you can choose the one that best suits your needs. Make sure it is resistant to the chemicals you need protection from.

If you are looking for epoxy paint of any type, there are many suppliers to choose from. Look for a company that has been around a long time. It should also have a reputation for selling quality products.

Here at Wiese Painting, we have over 65 years of experience as professional industrial and commercial painters. We guarantee that any hard-to-paint color or surface, like concrete, is tackled with professionalism and tricks that have been acquired over the decades. You will love the look of your freshly-painted home or business, so contact us today for your free quote!

Painting Concrete Floors

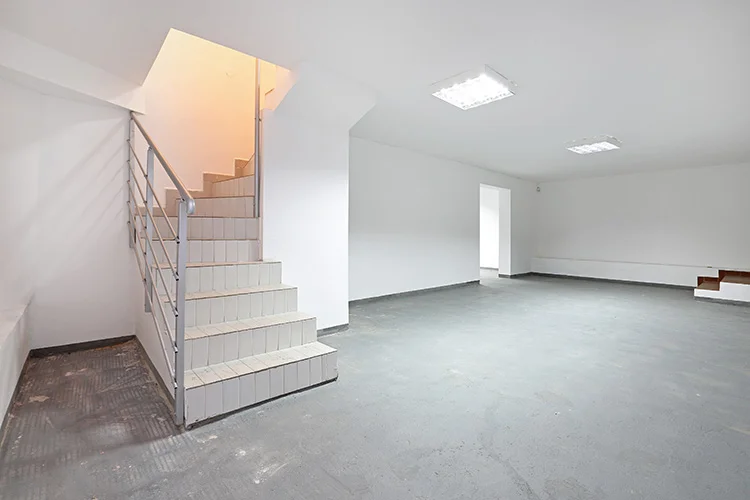
Painting Concrete Floor in Basement

Painting Concrete Floors

Concrete floors are not only durable but also easy to install and maintain. But, the typical gray color of concrete can make basement floors seem cold and uninviting.

Painting concrete is one of the most popular ways to spruce up the basement floor. It is also a straightforward process that can add warmth and color to any concrete surface.

Step 1 – Cleaning and Priming Your Floor: Start by sweeping away any dirt or debris before priming your floor with our favorite primer.

Step 2 – Adding Color: Choose a basement paint color and apply it to the concrete floor.

Step 3 – Maintenance: Maintain your basement paint finish by sweeping and dusting daily.

Painting concrete floors can be an intimidating task, but it doesn’t have to be! This article walks you through the process and also what tools to use. We’ll cover everything from prep work, paint types, benefits, colors, and more!

Is Painting Concrete Floors a Good Idea?

Yes! It’s a great idea to paint concrete floors. Painting is one of the most popular ways to spruce up basement flooring. Concrete paints help mask the surface stains and the years of wear and tear. Moreover, it also extends the lifetime of the concrete by preventing further damage. It also comes in different colors, finishes, and formulas, depending on the type of surface.

How Long Does Painted Concrete Last?

Painting concrete floors is a great way to add color and interest. However, for long-lasting concrete paint, ensure that your floor is clean and dry before painting. You’ll also want to prime it with a primer first!

Depending on the kind of paint you use, the concrete paint can last anywhere from three years to five years! However, the lifetime depends on certain factors such as:

  • Type of Paint
  • Level of Footfall
  • Exposure to Elements
  • Quality of Paint
  • Maintenance

Most brands suggest you apply a new coat every 3-5 years. A well-maintained concrete floor can help extend the lifetime of the paint. It shouldn’t be a problem since painted concrete is easy to maintain.

Does Painting Concrete Floors Make Them Slippery?

Painted concrete can be slippery when wet. The paints and sealers have a nonporous, and smooth coating that forms the external layer. This smoothens out the texture giving a slippery feel. Grits are added to the final coat of paint or concrete sealer, adding grip to the surface. Three common additives used to create texture are:

  • Silica Sand
  • Aluminum Oxide Beads
  • Polymer Grits

Sand and aluminum beads are heavy and settle in the bottom. This doesn’t go well with the application, thereby reducing its effectiveness. On the other hand, polymer pieces are lightweight and go more even, making them a popular choice.

Benefits of Painting Concrete Floors

Painting concrete floors is not an easy job. Concrete is porous and can absorb paint and moisture. Hence it requires additional prep work to ensure that the paint adheres well. But, despite the work, a painted concrete can spruce up the place.

Here are the benefits of painting concrete floors:

  • Prevents Moisture & Mold: Concrete being porous is notorious for rot, mold, and mildew. A painted floor can help prevent the moisture from seeping in, especially the basement floor.
  • Easy Maintenance: Concrete floors are challenging to maintain. The surface being porous, the grease stains, dust, and debris are impossible to clean. However, concrete paint seals the pores, thereby making cleaning easy.
  • Enhances the Appearance: Bare concrete slab can be grey and drab. A fresh coat of paint on the concrete floors can add visible warmth, color, and vibrancy to your basement or garage.
  • Increases Safety: Concrete floors often have cracks and an uneven surface. Painted concrete can help reduce the risk, creating a visible, smooth, and even floor.
  • Increases the Market Value: Painting the basement floor has an ROI of up to 70%, reflecting on the home’s resale value.

What Kind of Paint Do You Use When Painting Concrete Floors?

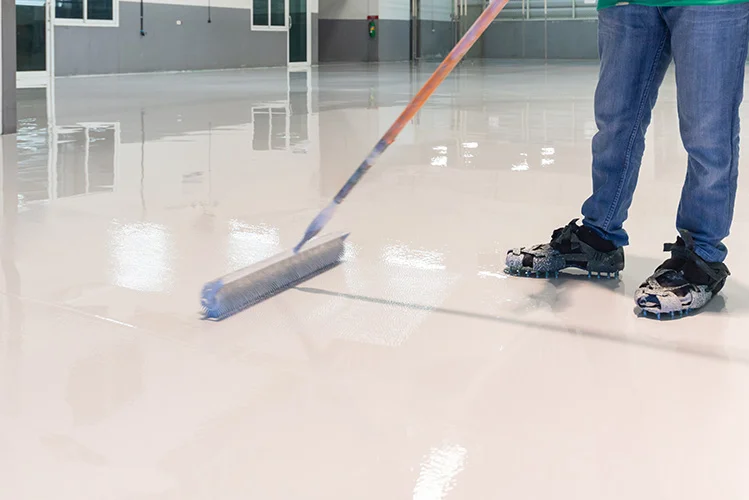
Worker Applying Epoxy Paint on Concrete Floor

Whether you are painting your garage floor, basement floor, patio, or only your basement laundry room floor, it pays to know what paint to buy.

Epoxy paint is best suited for concrete floors since they are durable and can take a lot of abuse. It also holds better than latex paint. They work well for garage floors since they are resistant to oil, gasoline, and chemicals. However, they are not suitable for basements since they tend to attract moisture.

Acrylic paints are the cheapest option, but they don’t last long and can be challenging to clean up. The best choice would be concrete basement paint that comes with an epoxy or acrylic base. They are durable, easy to clean, and cost-effective without compromising on quality.

What Is the Best Color to Paint a Basement Floor?

It isn’t easy to choose basement floor paint colors as the basement has very little natural light. The best way to decide on color would be by asking yourself what you want out of your basement.

The most common choice, black, can give off an elegant appeal, but dark colors absorb more heat. White is the most popular basement color as they don’t absorb heat and reflect light well.

Teals, greys, blues, greens can help create a relaxing atmosphere in your basement. They do not absorb too much heat, which is excellent if you plan on entertaining guests.

TIPS:

  • Before painting, test the colors on a hidden section of your basement to ensure you like them. This gives you an idea to test if they work well with the lighting in your basement.
  • Choose a paint color that will help hide dirt. In addition, you want something easy to maintain.
  • Also, keep into consideration the size of the room and the decor.

What Is the Best Way to Paint a Concrete or Basement Floor?

Concrete is not an easy surface to paint. It is porous, breathable, and also absorbs paint to an extent. However, the surface is pretty versatile, offering many options for repairs and improvements.

With the right tools, concrete floor materials, and techniques, you can turn a drab basement floor into a thing of beauty. The below steps can guide you to painting concrete floors.

Clear the Space

Before you paint, you must be able to see the floor. This will help you spot the issues like cracks firsthand. Spend time cleaning away what you don’t need. Donate, recycle or sell; do whatever works for you. Moving the remaining items into another room and create a space in your basement. Also, if the area is carpeted, remove the old carpet and area rugs to paint the concrete flooring.

Get Rid of the Gunk

Basement floors can also contain old paint splatters, adhesive, dirt, grime, and other substances. Paint can stick to these spots and make them stand out. Hence, you need to ensure that these are removed before the paint application.

Carpet glue is one of the strongest adhesives around and can be difficult to remove. Douse the glue with a lacquer thinner and then use a scraper to remove all the adhesive. You can also use the same method to scrape out gunk like hardened dirt and debris. Scraping doesn’t need to be backbreaking work if you use a scraper with a long extension pole.

Clean and Dry the Surface

New paint adheres better to a clean and dry surface. Start with a concrete degreasing product suitable for your floor (interior or exterior). These products are applied to damp floors. Hence you may want to use protective eyewear, gloves, and clothing before application

Then, use a floor cleaner to clean the basement concrete floors. Next, use a push broom to scrub the floor and vacuum using a shop vac. And let it dry thoroughly. It might take some time, but you will be able to see the spots where paint has been absorbed by the concrete.

Exterior surfaces like garage floors and patio floors can be easier to clean. First, wet the surface and spray the degreaser. Next, use a push broom to scrub the floor and wash it off with a garden hose. Finally, any stubborn rust spots left behind can be clean with a wire brush.

Fill Any Cracks and Holes

Fill Any Cracks and Holes Before Painting Concrete Floors

Cracks and holes should be filled before the painting concrete floor. Use a concrete filler for this step. It can flex with movement in case there is any settlement or shifting of the foundation after application. Use a putty knife to spread the filler over the cracks. Apply a second coat if needed and let it dry completely.

You can also use this time to fill any other holes in the concrete floor with a concrete patch or epoxy putty. You can find them at home improvement stores like Lowes or Home Depot. Again, let these products cure overnight before painting.

Holes in concrete basement floors can be hard to patch if the foundation has settled or shifted. This creates a gap between the concrete and bricks, stones, or rocks underneath. In such cases, remove any dirt from under these holes first with a wire brush.

Sand the Floor

Sand the entire surface of the concrete as the final step of prep work before priming. Sanding the rough areas ensures a smooth finish across the entire floor. Sweep or vacuum the dust with a construction vacuum or a shop vac. You do not want the dust to get under the paint as this will lead to peeling.

A clean floor is essential for the paint to adhere to the floor. Clean the basement floor with soap and water to ensure that it is free of dust. Keep in mind that there is no soap residue on the floor. Let it dry completely for 24 hours. Moisture on the floor can prevent the paint from adhering.

Use painter’s tape to mask off the walls and the baseboards along the edges of the room.

Prime After Painting Concrete Floors

A primer coat ensures that the paint sticks to the concrete floor. The primer that you choose should be compatible with both concrete and epoxy paints. Ensure that the primer you choose is fit for use in both interior or exterior concrete floors.

Use a paintbrush to apply the primer along the edges of the floor and cut in the edges. You can use the lambswool roller for the rest. Apply two coats and let dry for 24 hours.

Apply Epoxy Paint

Worker Applying Sealer as Top Coat Over Epoxy Floor

Once the primer is dry, apply the concrete paint. Start from the farthest corner and work your way to the door. Apply the paint and let the first coat dry for 12 hours before painting a second coat. As a top coat, apply a concrete sealer over the painted basement floor.

In the case of epoxy paint, you’ll need to mix the two parts as mentioned in the label. Then, use the same process you used for the primer to apply the epoxy. Most epoxy paints need only one coat. (But you may want to check the label firsthand). Lastly, seal the floor with a concrete sealer compatible with epoxy paints.

Keep in Mind:

Fill the paint tray half full with paint. Next, load the roller with paint from the paint tray and roll the paint on the concrete floor.

Wash the roller and paintbrush with dish soap and hot water right after you’ve finished.

Follow the Manufacturer’s Instructions on Painting Concrete Floors

Ensure that you follow the manufacturer’s instructions regarding the temperature, ventilation, and humidity. The cure temperature and humidity are essential for a successful paint job. With the right combination of the factors above, you risk the paint lifting off within a year.

Painted Concrete Floor Care and Maintenance

Painted concrete floors are becoming quite famous due to their rustic, industrial-like appearance. They are easy to clean and maintain. However, they pose a unique problem. The painted surface is coated with a sealant to protect the paint underneath. Therefore, the cleaner that you use should not harm the integrity of the concrete.

Here are a few things you can follow to ensure a longer lifetime.

  • Daily sweeping prevents dust accumulation. The buildup of dirt can scratch the surface of the concrete floor.
  • A mild soap and water solution will work fine for daily cleaning. Use a damp microfiber mop to clean the floor. Avoid water pooling on the floor.
  • Avoid using acid. Instead, use a diluted solution of vinegar. Vinegar not only cleans the floor but also prevents the growth of mold and mildew.
  • Concrete floors should be resealed every two years to protect the paint job.

Conclusion

With the right paint, you can turn your basement floor into a bright and welcoming space. Painting is one of the most popular ways to spruce up basement floors, and it’s inexpensive and easy to apply. However, it has a long drying and curing process. You may have to wait as long as a week before walking on it again.

Depending on the type of paint and protective coat or sealant you use, painted concrete floors can last anywhere from three to five years! After that, you’ll have to top it up with a fresh coat of paint.

If you want a paint finish that lasts longer and looks more professional, then epoxy is the one. Epoxy is better than other paints because it can last longer and it looks good too. Besides, stained and painted concrete floors also improve the look of concrete.

Here at Wiese Painting, we have over 65 years of experience as professional industrial and commercial painters. We guarantee that any hard-to-paint color or surface, like concrete, is tackled with professionalism and tricks that have been acquired over the decades. You will love the look of your freshly-painted home or business, so contact us today for your free quote!

Industrial Painting Equipment

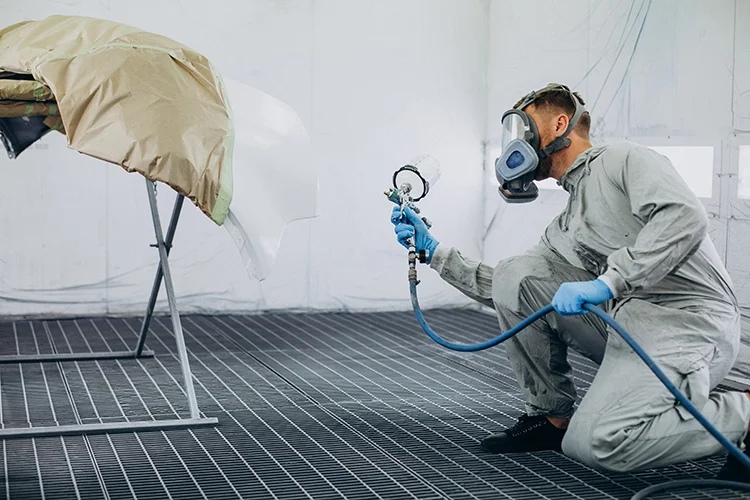
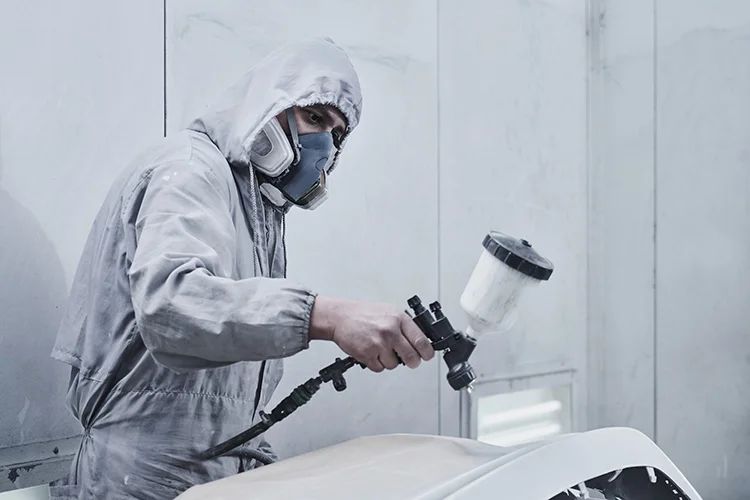
Industrial Painting - Car Mechanic Using Paint Spray Gun

Industrial painting is a massive industry with quite a lot of paint application techniques. Be it traditional, modern, or cutting-edge technology, the technique selected depends on the project. And with every application technique comes different painting equipment.

To better understand industrial painting, you should know the different types of industrial painting equipment.

What Is Industrial Painting?

Industrial painting is a diverse field with multiple applications, surfaces, and painting methods. It is used in warehouses, garages, factories, and machines. Rather than aesthetic purposes, it serves to protect the surface from deteriorating. They also help to stop leaks and prevent corrosion. And these are the tip of the iceberg.

In short, industrial paint provides more functionality in addition to protecting from general wear and tear. The paint is made of polyurethane and epoxy, which ensures a smooth and durable coating. Further addition of additives makes the paint fire-resistant.

Professional painters use a variety of tools and techniques to apply industrial paint.

  • Roller works best in flat areas, especially walls and floors.
  • Air Spraying applies the paint as a fine mist through the atomization method. Compared to other methods, liquid spray painting gives a rather smooth application.
  • Airless Sprayer uses pressure to apply paint. They are quick, hence efficient in painting large areas.
  • Paintbrush is the traditional painting method and also the most time-consuming. However, it works the best for smaller areas.
  • Electrostatic application is best used in manufacturing since they require a professional touch. In this method, the paint bonds via electricity.
  • Dip Coating is a unique method where the technician dips the component in a vat of industrial paint.

What Is a Painting Machine?

Painting machines are automatic systems that apply paint in manufacturing industries. While some are hand-operated, others are robot operated. The latter also has conveyor systems to quicken the process. For example, spray guns. You can see them in various industrial painting projects and home applications. The spray gun uses high pressure to paint a thin, even coat of paint.

Painting machines have a vast range of coating applications. Above all, it reduces operating costs, increases consistency and also the product quality.

What Is the Best Industrial Paint Sprayer?

Industrial painting is a huge task and requires machinery of an appropriate size. Depending on the application, the equipment can vary in size and capability. Here are a few types of paint sprayers suitable for industrial use:

Robot Arm Industrial Paint Sprayer

Paint sprayers are of two types: Airless and those driven by air. They have different specifications and restrictions. The best sprayer depends on the project.

Airless Paint Sprayer

With an airless sprayer, you pump the paint straight from the container without a need for compressed air. Depending on the attachment, they accommodate thin stains to thick coatings.

They are also the fastest and can spray the most coating in a limited amount of time. These pumps are suitable for large projects such as industries. They give uniform coverage and don’t require you to thin the paint.

Compressed Air Sprayer

Compressed air sprayers are used both in industrial and home applications. It uses compressed air to create a smooth and uniform finish. The typical setup includes a spray gun, compressor canister, and a high-pressure hose. Unlike the airless sprayer, you need to thin the paint beforehand. Air spray is easy to use but requires plenty of prep work. On the flip side, they consume a lot of paint and are less versatile than an airless sprayer.

HVLP Sprayers

HVLP or High-volume, low-pressure (HVLP) sprayer uses a combination of air and pressure to create a thin layer of paint. They have a high level of transfer efficiency resulting in more paint reaching the sprayed area. On the flip side, it doesn’t work well with think paint types like latex. Depending on the paint job, you may have to thin the paint. Due to the nature of the equipment, they are ideal for detail and smaller areas.

Specialty Sprayers

The sprayers mentioned above give a rather smooth and even finish. However, if you require a different finish, you may need a specialty sprayer. From handheld spray guns to sprayers that use carts or stands, there are quite a few to suit your every need. In addition, they allow for flexibility depending on the application.

  • Texture sprayers allow creating textures such as popcorn, orange peel, knockdown, and splatter.
  • Line striping machines help create paint lines on the ground. They use a paint sprayer aligned with a roller to create crisp lines. They also have a handle to roll the equipment on any surface.

Electrostatic Painting Equipment

Otherwise called powder coating, the electrostatic painting uses an electrically charged powder. During the process, both the product and the powder are electrically charged. This ensures a strong bond between the product and the powder. In some cases, it is combined with other spray painting techniques for a better finish.

  • Air-atomized electrostatic spraying uses a combination of electricity and compressed air to paint.
  • Air-assisted airless electrostatic spraying depends on electricity, compressed air, and a small orifice for painting.

Paint Finishing Equipment

Paint finishing generally incorporates many processes, including paint application and also finishing. The tools used in the process are called paint finishing equipment. The finishing coat adds a layer of protection against chemicals present in an industrial environment. They serve two purposes; first and foremost, functionality and then aesthetics.

Car Mechanic Using Paint Airbrush Pulverizer

The first step in applying any coating is to prepare the surface. In an industrial arena, the sprayer itself handles the mixing part. They have multi-component spraying equipment meters which mix the paint beforehand.

Coming to painting, conveyor systems are critical for paint application. They allow for a more efficient painting. Furthermore, it also allows the technician to control the application. Every paint application method ( dipping, powder coating, spraying) has a different conveyor system.

The final step of the painting process is the paint finishing which is done in a curing oven. Every oven features a shell, heater unit, and air system (supply, circulate and exhaust). While the times vary, every product cures in the oven for at least 30 minutes.

Conclusion

The industrial paint application process is quite complicated, to say the least. There’s a lot that goes into formulating and executing industrial painting projects. Depending on the type of paint, application, and method, the equipment also varies. Sometimes the equipment itself is the deciding factor for choosing the application process.

Before investing in paint equipment, it is crucial to weigh the pros and cons. And that’s why you need an expert painter guiding you in the process. Contact an industrial painting services company with your questions. And they will be able to give you professional assistance.

Here at Wiese Painting, we have over 65 years of experience as professional industrial and commercial painters. We guarantee that any hard-to-paint color or surface is tackled with professionalism and tricks that have been acquired over the decades. You will love the look of your freshly-painted home or business, so contact us today for your free quote!

Everything You Need to Know About Painting Over Graffiti on Walls

Man Spraying Graffiti on WallsGraffiti on Walls (Word Count: 1,496 / Read Time: 6 min.)

Any images or lettering painted on public places like buildings, fences, train cars, and overpasses is called graffiti. They are usually made using spray paints and permanent markers. 80% of graffiti is the result of tagging. Another 10% are gang-related, and 5% are artistic.

Graffiti has been increasing over the past few years. Even cameras and warning signs don’t deter the Banksy wannabe. The faster you remove the graffiti, the less likely it is to appear again. Reports say that there is a zero occurrence of the same if removed within 24-28 hours.

But how do you remove graffiti from different surfaces? Unfortunately, the answer is not that simple. It all depends on the type of surface and how long it has been there. This article walks you through the different graffiti removal techniques.

We will be taking an in-depth look into exactly what it takes to paint over graffiti in the following discussions:

Can I Paint Over Graffiti?

Painting is one of the easiest and cheapest methods of removal. It also causes the least amount of damage to the surface. Furthermore, repainting allows you to use a glossy enamel which deters further vandalism. It makes it difficult to paint over than a flat finish. However, it may not be easy to get an exact color match unless you have leftover paint lying around from when you first painted.

What Paint Do You Use to Cover Graffiti?

Experts recommend glossy paint with a satin or semi-gloss finish to cover graffiti. The reason being, it resists any marks, even graffiti, than any other finish.

Can You Spray Paint to Cover Graffiti?

Spray paint doesn’t do well in covering graffiti in large areas, and you also run the risk of the graffiti bleeding through. However, if you have small areas that need covering, you can try spray paint.

Best Paint to Cover Graffiti

Best Paint to Cover Graffiti on WallsGraffiti can be a painful sight, be it your home or outdoors. Here are some paints that provide exceptional coverage and help hide those stains.

  • Sherwin-Williams Frazee Paint Graffiti Cover-Up: Water-based paint with a flat finish formulated for exterior graffiti
  • Visions Workhorse™ Graffiti Cover-Up: Provides excellent coverage and long-lasting finish
  • Zinsser Cover Stain: Primes and seals the affected surfaces and prevents the stains from reappearing

Oil-based paint works the best to cover over graffiti, especially on metal surfaces.

How to Cover Unwanted Graffiti on Walls

There are many ways to remove graffiti from different surfaces. However, the inexpensive method of all is repainting. With proper prep work and paint, you can conceal the graffiti to a large extent.

Here’s how you remove graffiti from surfaces.

Choose the Right Primer

Preparing the surface and priming are the essential steps to a successful paint job. When it comes to graffiti, you need a stain-blocking primer. They absorb the older paint beneath and prevent it from bleeding through the new coat. It is imperative when you are using lighter colors to cover graffiti.

On another note, light color cannot conceal graffiti particularly well. In this case, you may have to remove graffiti before painting. Either pressure-wash it or use chemical solvents to strip the paint.

Choose the Right Paint

Coming to paints, it is better that you choose oil-based glossy paints. It makes it difficult for future graffiti to stick to the wall. Moreover, oil-based paints are durable and generally used on exterior surfaces. Water-based and latex paints are not as durable and can cause graffiti to bleed through. If the graffiti bleeds, use a stain primer-sealer to stop further damage.

Coming to the color, dark colors are the easiest to paint over if you can match the color. It’d be great if you have some old paint on hand. Otherwise, you may have to take samples to the paint store. For lighter base colors, switch to a darker color like brown or black. They are easy to color match if you are in a graffiti-prone area.

Make a note to buy extra paint cans. In case of any future vandalism, you can paint the spot instead of the entire wall.

Surface Preparation

All the surfaces should be clean of dirt or grease since they hinder paint adherence. Use a rag to wash the surface with a mixture of soap and water. In the case of a large surface, a pressure washer should work well. It should be dry completely before you paint.

Primer

The graffiti can bleed and show through the new paint. To prevent this from happening, prime the wall with an even coat of stain-blocking primer. Let it dry for 3-4 hours or according to the manufacturer’s instructions.

Paint Over the Graffiti

For a successful paint job, match the new paint with the base color. Draw a border around the graffiti and paint over it with a brush or a roller. Allow it to dry for 3 – 4 hours in normal drying conditions and paint another coat.

How to Paint Over Indoor and Outdoor Graffiti

When it comes to outdoor graffiti, you need a product that primes and seals at the same time. This prevents the stains from resurfacing on the afresh painted surface. The following method helps to cover up graffiti stains:

Surface Preparation

  • Before painting, ensure that the wall is dry completely. It should be free of anything that hinders the adhesion.
  • Remove loose and failing material with a stiff bristle brush to a sound edge.
  • Use a fine-grade abrasive paper to feather sound edges.
  • Ensure that the wall is free of contaminants. Use a mold remover to remove all visible signs of organic growth on the surface. Follow manufacturer’s instructions for a proper application.
  • Rinse the surface with clean water to remove any residue.
  • Fill in the cracks and small surface defects with a suitable filler. Finally, sand it down to a smooth surface.
  • Once the prep is complete, the moisture content of the wall should not be more than 18%.

Priming

  • Prime the wall containing the graffiti with a coat of primer.
  • Allow it to dry for no less than 2 hours.

Decoration

  • Decorate with two full coats of exterior paint to conceal the graffiti. Allow a minimum drying time of two hours. The time between the coats depends on the brand and also the drying conditions.

What is the Best Way to Remove Graffiti Paint from Walls?

The graffiti cleaners and solvents vary depending on the surface. You can buy them from hardware stores or paint stores in your locality. Keep in mind that you need to remove graffiti within 24-48 hours for the products to work.

Removing Graffiti Paint from Brick WallsBrick and Concrete – Use a heavy-duty paint stripper like the one from Sure Klean to cut through and remove graffiti from any masonry surfaces. The gel consistency of Sure Klean enables it to be applied with roller, brush, or spray equipment. Allow the product to work its magic and use a pressure wash to remove all residue.

Metal – Remove graffiti from metal surfaces with a small amount of paint thinner. If that doesn’t work, use steel wool to scrub it in a gentle manner without scratching the surface.

Glass – Most latex paints need only soap and warm water. Soak them first and then scrape them away.

Plastic – Use a light penetrating oil to remove graffiti. Do not use a thinner as that can soften the plastic surface.

Wood – For unsealed wood use, a power wash to remove graffiti. In the case of sealed wood, you can use mineral spirits.

Does Anti-Graffiti Coating Work?

Anti-graffiti coatings work by preventing the paint from adhering to the surface. They are made of clear polymers that form weak bonds with the substrate. This allows for easy removal.

Once graffiti appears on the surface, you can remove it using a power wash. Unfortunately, the coating also gets removed in the process.

Conclusion

No matter how beautiful graffiti may be, it is still a nuisance since it can attract street delinquency. However, removing it is not an easy task. Depending on the surface and the paint, you would be removing graffiti in different ways. This is because every substrate interacts with the paint differently. However, the easiest of them all is repainting over the graffiti. It also causes the least amount of damage to the substrate.

On the other hand, you may find it challenging to find a color match. Without an exact match, you may end up painting the entire wall. Also, if not appropriately treated, the graffiti can bleed through the new paint.

Here at Wiese Painting, whether it’s removing unwanted graffiti on walls or you want to give your home a fresh new look, we have over 65 years of experience as professional painters. We guarantee that any hard-to-paint color or surface is tackled with professionalism and tricks that have been acquired over the decades. You will love the look of your freshly-painted home or business, so contact us today for your free quote!

Can You Paint Vinyl Siding?

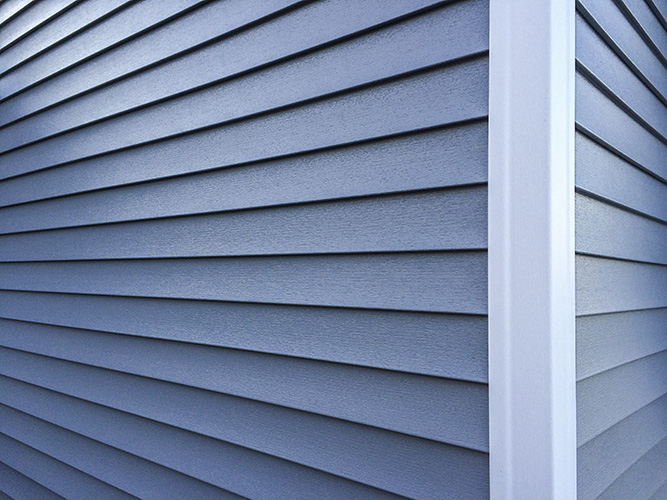
Home Vinyl SidingVinyl siding is a hardened, durable plastic wrapping for your home used for waterproofing and aesthetic reasons. They are low maintenance and can last as long as 40 years if cared for properly.
However, after a couple of decades, they can fade and change color. The good news is that you can repaint your vinyl siding and make it look as good as new. However, vinyl can be finicky and not as easy to paint.

Our article answers all the questions you may have about painting vinyl siding, including the choice of paint, color, factors to consider, steps to paint, and much more.

Can I Paint Over My Home’s Vinyl Siding?

Yes! You can paint your vinyl siding. It is an easy and cost-effective way to update it as long as it is in good condition. With a new look, you can push the replacement for a few more years. Moreover, it also gives you the creative freedom to choose your colors. Painting your vinyl siding can give you long-lasting and great-looking results.

Is Painting Vinyl Siding Durable?

Though you can paint vinyl siding, it is not as long-lasting as the siding itself. Painting is just a temporary solution until you can get to replacing the siding itself.

A fresh coat of paint can last anywhere from 2-5 years. However, it depends on the weather conditions. The paint may fade quicker if you live somewhere with extreme conditions, like snow, direct sunlight, and humidity. And you may have to refresh often.

Factors to Consider When Painting Vinyl Siding

Vinyl siding painting can give your home a facelift and increase the curb appeal like no other. However, it is not that easy. You have to consider the below factors before your paint your vinyl siding.

Warranty

In most cases, the warranty is void if the siding is repainted, even a brand new one. Ensure that you check if it is in effect. Consult with your insurance agent before you decide to paint. However, you can paint if your warranty is expired or no longer valid.

Keep in mind that if your warranty is currently in force, the insurance agency may reject the claim if the vinyl siding is painted.

Cost of Painting vs Replacement

According to HomeAdvisor, the cost of painting the exterior of your home amounts to $1,687 – $3,907, while a new vinyl siding costs $5,000 – $14,050. Although the price of vinyl siding is higher, it comes with a 30-year lifetime guarantee. Furthermore, it has an ROI of 76.4%.

But, when it comes to painting, you may have to repaint every ten years. More frequently if your home gets exposed to inclement weather. Another point you may have to consider is that a poor paint job can take the appearance of the house from bad to worse.

Paint Color Selection

If you decide to paint your vinyl siding, ensure that you choose the right color and the siding brand. Too dark of a color can cause the siding underneath to warp when exposed to sunlight. Ideally, the color you choose should be similar to the existing color or lighter.

Integrity of the Siding

Your siding serves as the first life of defense protecting your home against outdoor elements. With a new one, the professional contractor first inspects the home for any damage from pests, moisture, walls settling, etc. Any issues arising are fixed beforehand. On the other hand, painting vinyl siding can hide the damages from the moisture or pests causing mold, nesting, etc.

Insulation

Painting your old vinyl siding doesn’t do anything for the insulation except give your home a fresh look. However, if you change the siding, you add a layer of insulation underneath, improving your energy efficiency and durability.

Best Paint for Vinyl Siding

Not all paint will stick to vinyl. You need vinyl-safe paint from brands such as Benjamin Moore or Sherwin-Williams.

The best paint to use on vinyl siding is exterior latex urethane containing both acrylic and urethane resins. In addition, both the manufacturers mentioned above have paints specially engineered for vinyl siding with an entire palette of colors.

Vinyl Paint Formulas

The expansion and contraction of vinyl is the biggest challenge for paint formulators. For vinyl siding, choose a latex urethane paint that can flex with the siding. A paint that sets too hard cannot withstand the forces of the environment and weather.

Several paint companies manufacture a specifically formulated base for this task. The only remaining issue is the joints where pieces of siding overlap. Contraction during frigid winter may expose thin lines of unpainted siding.

Most Popular Paint Colors for Vinyl Siding

Selecting the color for the exterior of your home is essentially a decision based on personal tastes. Light and pale colors are generally a safer option. Moreover, it will help make a small house appear larger than it is. However, you can also go for medium transition shades for a contemporary look.

Here are some of the famous vinyl siding colors ranging from timeless neutrals to contemporary, bold shades.

  • Most Popular Paint Colors for Vinyl Siding - Color ChartAutumn Red
  • Coastal Blue
  • Flagstone
  • Desert Tan
  • Granite Gray
  • Light Maple
  • Forest Green
  • Linen White
  • Newport Taupe
  • Sable Brown

What Color Vinyl Siding Fades the Least?

Vinyl siding materials do fade over time. Darker colors fade much more than light shades. You’ll notice less fading with the light shade. White fades the least while deep browns and reds fade noticeably faster. While technological advancements have made dark colors fade-resistant, they still lose colors faster than whites and neutrals.

Can You Paint Vinyl Siding a Darker Color?

Darker colors absorb heat which is not ideal in the summer months. It can make the house hotter than it is. Moreover, they can also cause the vinyl siding to warp and burst open. They can also create maintenance problems. However, if you’d still prefer a dark shade, go for vinyl-safe paint from a reputed company. It should help keep your sidings safe.

Does Paint Stick to Vinyl Siding?

Vinyl resists regular paint. Hence you will need vinyl-safe paint. It sticks better and gives a smoother finish that lasts at least for a couple of years. Cleaning and prepping the surface will also result in a good paint job. Additionally, look to that you work in the proper climate.

How to Paint Vinyl Siding?

As with any paint application, a great paint job can give your home a new look. Unfortunately, bad painting can make your home’s appearance even worse. Here’s how you can paint your vinyl siding:

Step #1: Work in the Right Weather

To start with, paint in appropriate weather conditions for proper adhesion. A sunny, hot, humid, or windy climate may cause the paint to flake or peel off, as well as form cracks in due course. The ideal weather should be mild temperatures, low relative humidity, and an overcast sky to paint vinyl sidings.

Step #2: Choose the Proper Paint

The paint should be vinyl-safe from a premium quality brand. And not just any paint from the aisle. The paint should:

  • Contain acrylic and urethane resins. It helps to accommodate the expansion and contraction of vinyl.
  • Be the same shade or lighter than the existing siding.

Step #3: Prep the Surface

Start with cleaning the surface thoroughly. It gets rid of stains and grime off of your siding. However, a hose is not going to cut it. It would help if you had a power washer. You can purchase cleaner from the hardware store or use the following recipe for a cleaning solution:

  • 1 gallon of water
  • 1/3 cup laundry detergent
  • 2/3 cup powdered household cleaner
  • 1 quart (oxygen-based) liquid laundry bleach

Mis everything and apply with a sprayer. Use a soft-bristled brush and scrub by hand for best results. Then follow it up with a rinse and allow it to dry. Cleaning the siding is the crucial step towards achieving a professional-quality paint job.

Step #4: Mask Off Trim, Doors, and Windows

Mask your trim and hardware using masking tape and masking paper. Alternatively, you can also use plastic sheeting to mask off areas you don’t want to paint.

In case you are using a paint sprayer, tape the plastic over glass surfaces, windows, doors, and walls to protect them from the paint.

Step #5: Prime the Siding

Using a primer depends on the surface and also your personal choice. While some pros use it in almost all cases, others use it only when needed depending on the condition of the siding. Experts recommend using a primer only if the siding is pitted or shows signs of deterioration. In case you are using a primer, make sure that the paint you use is formulated to stick to it. A simple solution to priming is to follow the advice of your paint manufacturer.

Apply the Paint to Vinyl Siding - Paint Roller with Red PaintStep #6: Apply the Paint

Once the primer is dry, apply two coats, thin and even. After the first coat of paint is dry, go over again. But before that, use a brush to cut in around windows, doors, and corners. Then, use a roller for the rest. Finally, complete the process with a topcoat applied with a sprayer.

A brush or a roller may work for a smaller area. However, you may want to use a paint sprayer to make the process easier for a larger area.

Conclusion

Painting vinyl siding was impossible until a few years ago since most paints would not adhere to vinyl. However, the technological advancements in paint manufacturing have given a new look to vinyl. Unfortunately, vinyl has some unique characteristics making the application difficult. For the paint to last, you need proper prep work, priming, and also use vinyl-safe paints.

Painting vinyl siding is a laborious job, and if done right, the paint can last as long as ten years. In addition, repainting is less expensive than replacing and hence can save you money. Finally, make sure that vinyl siding is in good condition. Wash it regularly to get rid of mold, mildew, dirt, and the chalky residue that settles over time. Maintenance is the key to the paint’s longevity.

Wiese Painting LogoHere at Wiese Painting, we are experienced with painting all colors, be it your apartment, home, or office. We guarantee that any hard-to-paint color or surface is tackled with professionalism and tricks that have been acquired through years of painting. You will love the look of your freshly-painted home, so contact us today for your free quote!